Foundation Planting Before and After
Our house was a flip house. The original owners had lived there for decades and after they moved out, their estate sold it to a real estate agent, who cleaned it up a lot and got it ready for resale. While they did some pretty nice things inside and most of the work was done well, they, like many flippers, basically ignored the landscape. For us this was a check in the pro column. We wanted to create our own garden, not live with someone else's and a basically blank slate would allow us to do just that.

This isn't my picture, it's from the real estate listing, but you can see what we had going one. The tall plants were pampas grass and they were planted (every other one) with very small red tip photinias. Niether of these plants were a good choice for this space. Due to two wonderful oak trees our front garden is in total shade. Pampas grass is a full sun plant. Photinias are classified as a small tree or large shrub. They can get 10 feet tall. They are not the plants you want to put in front of your windows if you ever want to see out of them.

It all needed to come out and shortly after we moved in, it all did. Since had only been int he ground for a few months at the most, we just popped them all out of the ground and set them down by the curb to see if someone would adopt them.

We replaced it with Ruby Slippers Oaklead Hydrangias, Farfugiums, and an assortment of ferns. I'd like to say this part of the project was easy, but we did it when I was about 6 months pregnant. I could bend over and work, or I could breath, but I couldn't do both at the same time. I chose to alternate between the two.

Our house still has it's original brick planter. It isn't irrigated (Though someone put some type of plumbing into it) and we have problems keeping things alive in it. We have tried a variety of things in there, nothing has wowed us so far and now the hydrangeas block passersby from seeing it. Eventually we come up with the right combination and maybe do some strategic pruning or transplanting.
Everything filled in a lot over it's first year. You really could still enjoy the perennials that had been planted. Since then, it has REALLY filled in.

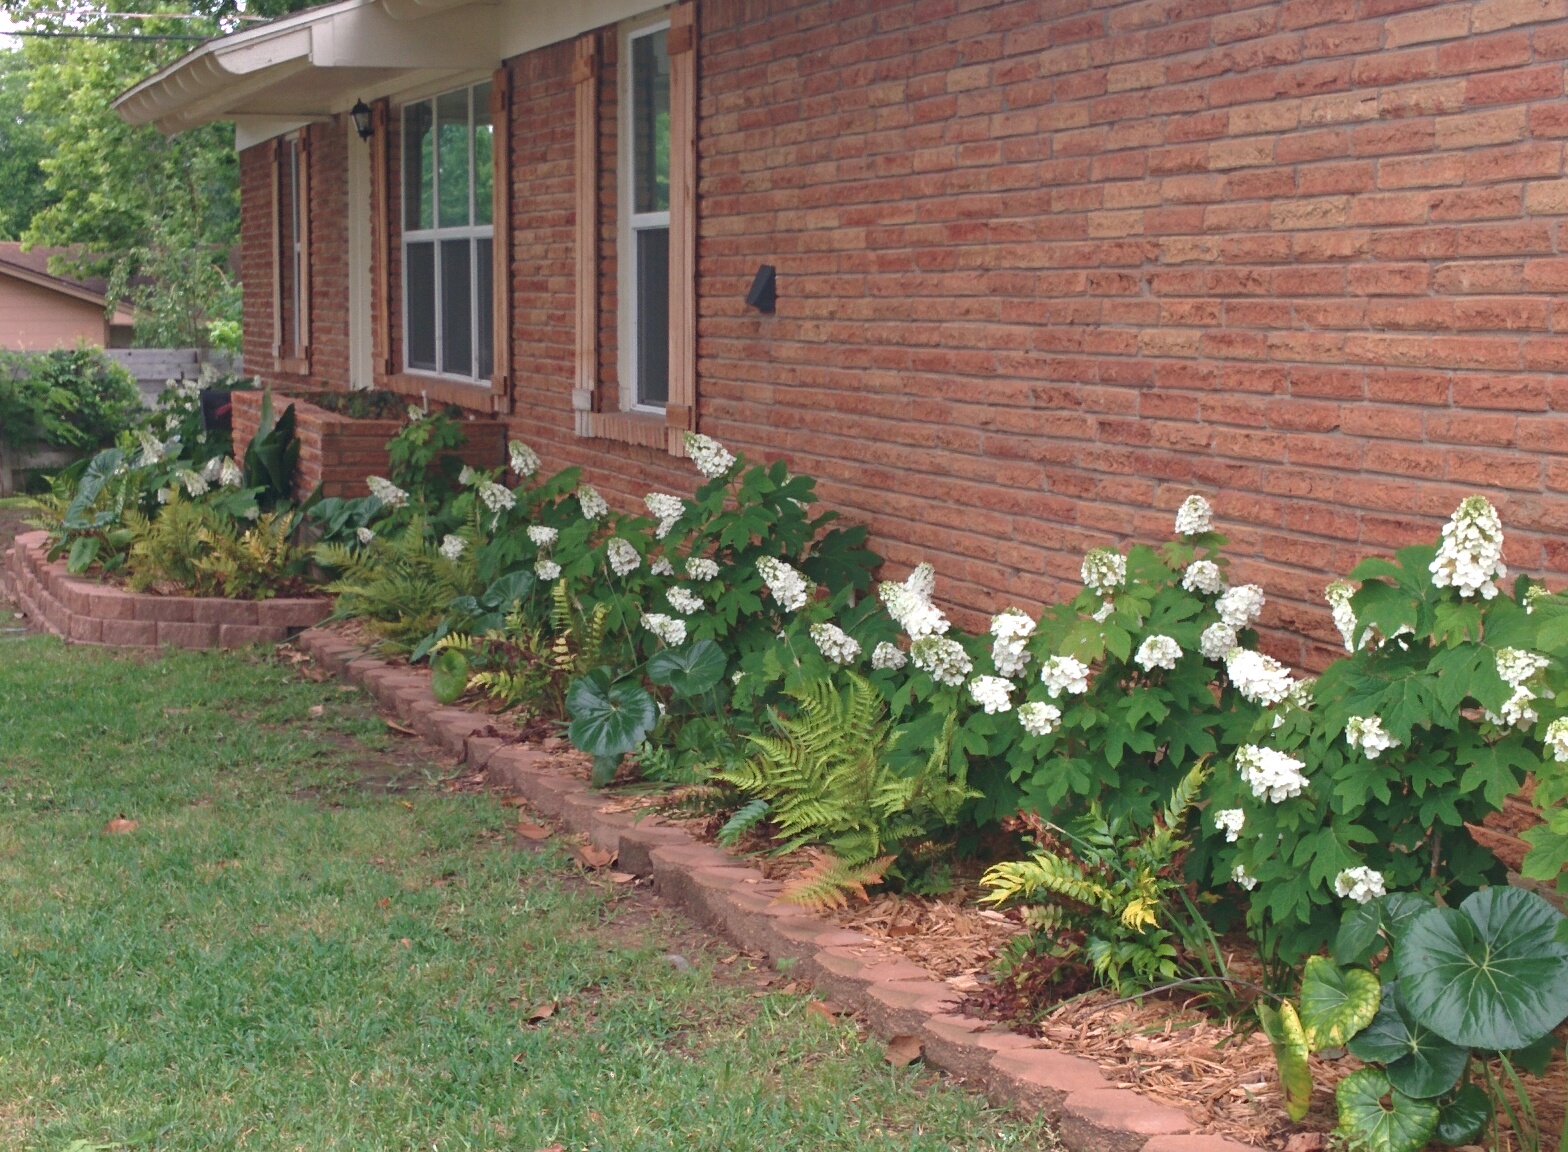
As you can see this year we have a very full planting along our foundation. The flowers start off white in the spring when they first open and then they fade to a pink and eventually a brown.

You can still see some of the perennials poking through between all of the shrubs. They have all gotten a lot bigger too.


Over time we want to add some anemones and other perennials (though it's pretty stuffed now). There has also been a few additions of daffodils. The idea is to try and keep something blooming all the time. The Farfugiums bloom in the late fall/early winter here and play nicely with the fall color of the hydrangeas. Sorry the pictures are kind of messy.


The hydrangeas are deciduous and loose their leaves each year. In our case they are usually completely bare in December and start to reflush in February/March. Our foundation looks a little naked that time of year, but we're okay with it. The rest of the year it stops traffic...literally, we've caught people stopping their cars to look at the white flowers on the hydrangeas and Mable's Daylily Bed in the front yard.


I am jealous of those oakleafs! If we didn't have deer I would hope to have some kind of situation like that around the yard or a few trees at least.
ReplyDeleteSo far, we haven't seen any at this house. They would need to have come up through the neighborhood pretty far from the greenspace around the river to get to our house.
DeleteRebecca, I see you did a lot of work (being pregnant!) and now your front garden looks elegant, white hydrangeas decorate your house on all the long wall. Yes, your first project was in success, lovely view from the road.
ReplyDeleteThanks!
DeleteA big improvement! Passers-by must enjoy the beauty of those hydrangeas.
ReplyDeleteIf there is any irrigation nearby you could tap into it and run a discreet pipe up to the planter.
There's a pipe that runs up into the planter and is capped off, so it probably wouldn't be too hard a fix to add it in assuming ti's all hooked up with way we think it is. The only excuse we have is laziness and that it hasn't worked its way to the top of the priority list yet.
DeleteThat's a LOT of work when you're pregnant but you laid a good foundation (pun intended). I love the oakleaf hydrangeas, a plant I tried and failed to grow in my former shady garden. Our home purchase 7 years ago was also driven by the garden space, although that factor was more important to me than to my husband. Our first projects involved taking out the lawn, one area after another, a project I'm glad to have behind us. Unfortunately, I've little in the way of "before" photos but now you've got me wondering if I can find some of those old real estate sale posts to fill in the blanks.
ReplyDeleteThe internet is a wonderful place. Often they are on zillow, but some realtors pull them down.
DeleteThe stream of hydrangeas in front are beautiful. All you need to do is widen the bed and pull the perennials forward so all can be seen.
ReplyDeleteI've though about this. There is concrete curbing surrounding some of the beds, but we could just jump the curbing and create a bed on the other side. We've done it at other houses.
DeleteWhat a lovely transformation! I especially like the way the aging hydrangea blooms echo the color of the brick behind them.
ReplyDeleteThey do look that way in the photos. In real life the brick is much more orange but still very pink too. It's a strange brick color.
DeletePlaces and the plants looking pleasant. Photinia Robusta | Photinia Robusta for Sale
ReplyDeleteThis comment has been removed by a blog administrator.
ReplyDeleteThis comment has been removed by a blog administrator.
ReplyDeleteI'm so glad you shared this! Our ranch house is very similar to yours- even the challenging brick planter! :( I am encouraged that you did so well with the Oakleaf Hydrangeas. We have 2 large maples in front and face North, so it's pretty shady. I'm curious, what direction does your house face? Thanks!
ReplyDeleteOur house faces east.
Delete